DLMM Operations (Tour)
Guided tour of the Meteora DLMM interface and how to use it effectively.
Course Overview
In This Lesson
Understand the key components and sections of the UI, navigate the dashboard, and master the Ape In and Zap Out features
Navigate the DLMM Interface
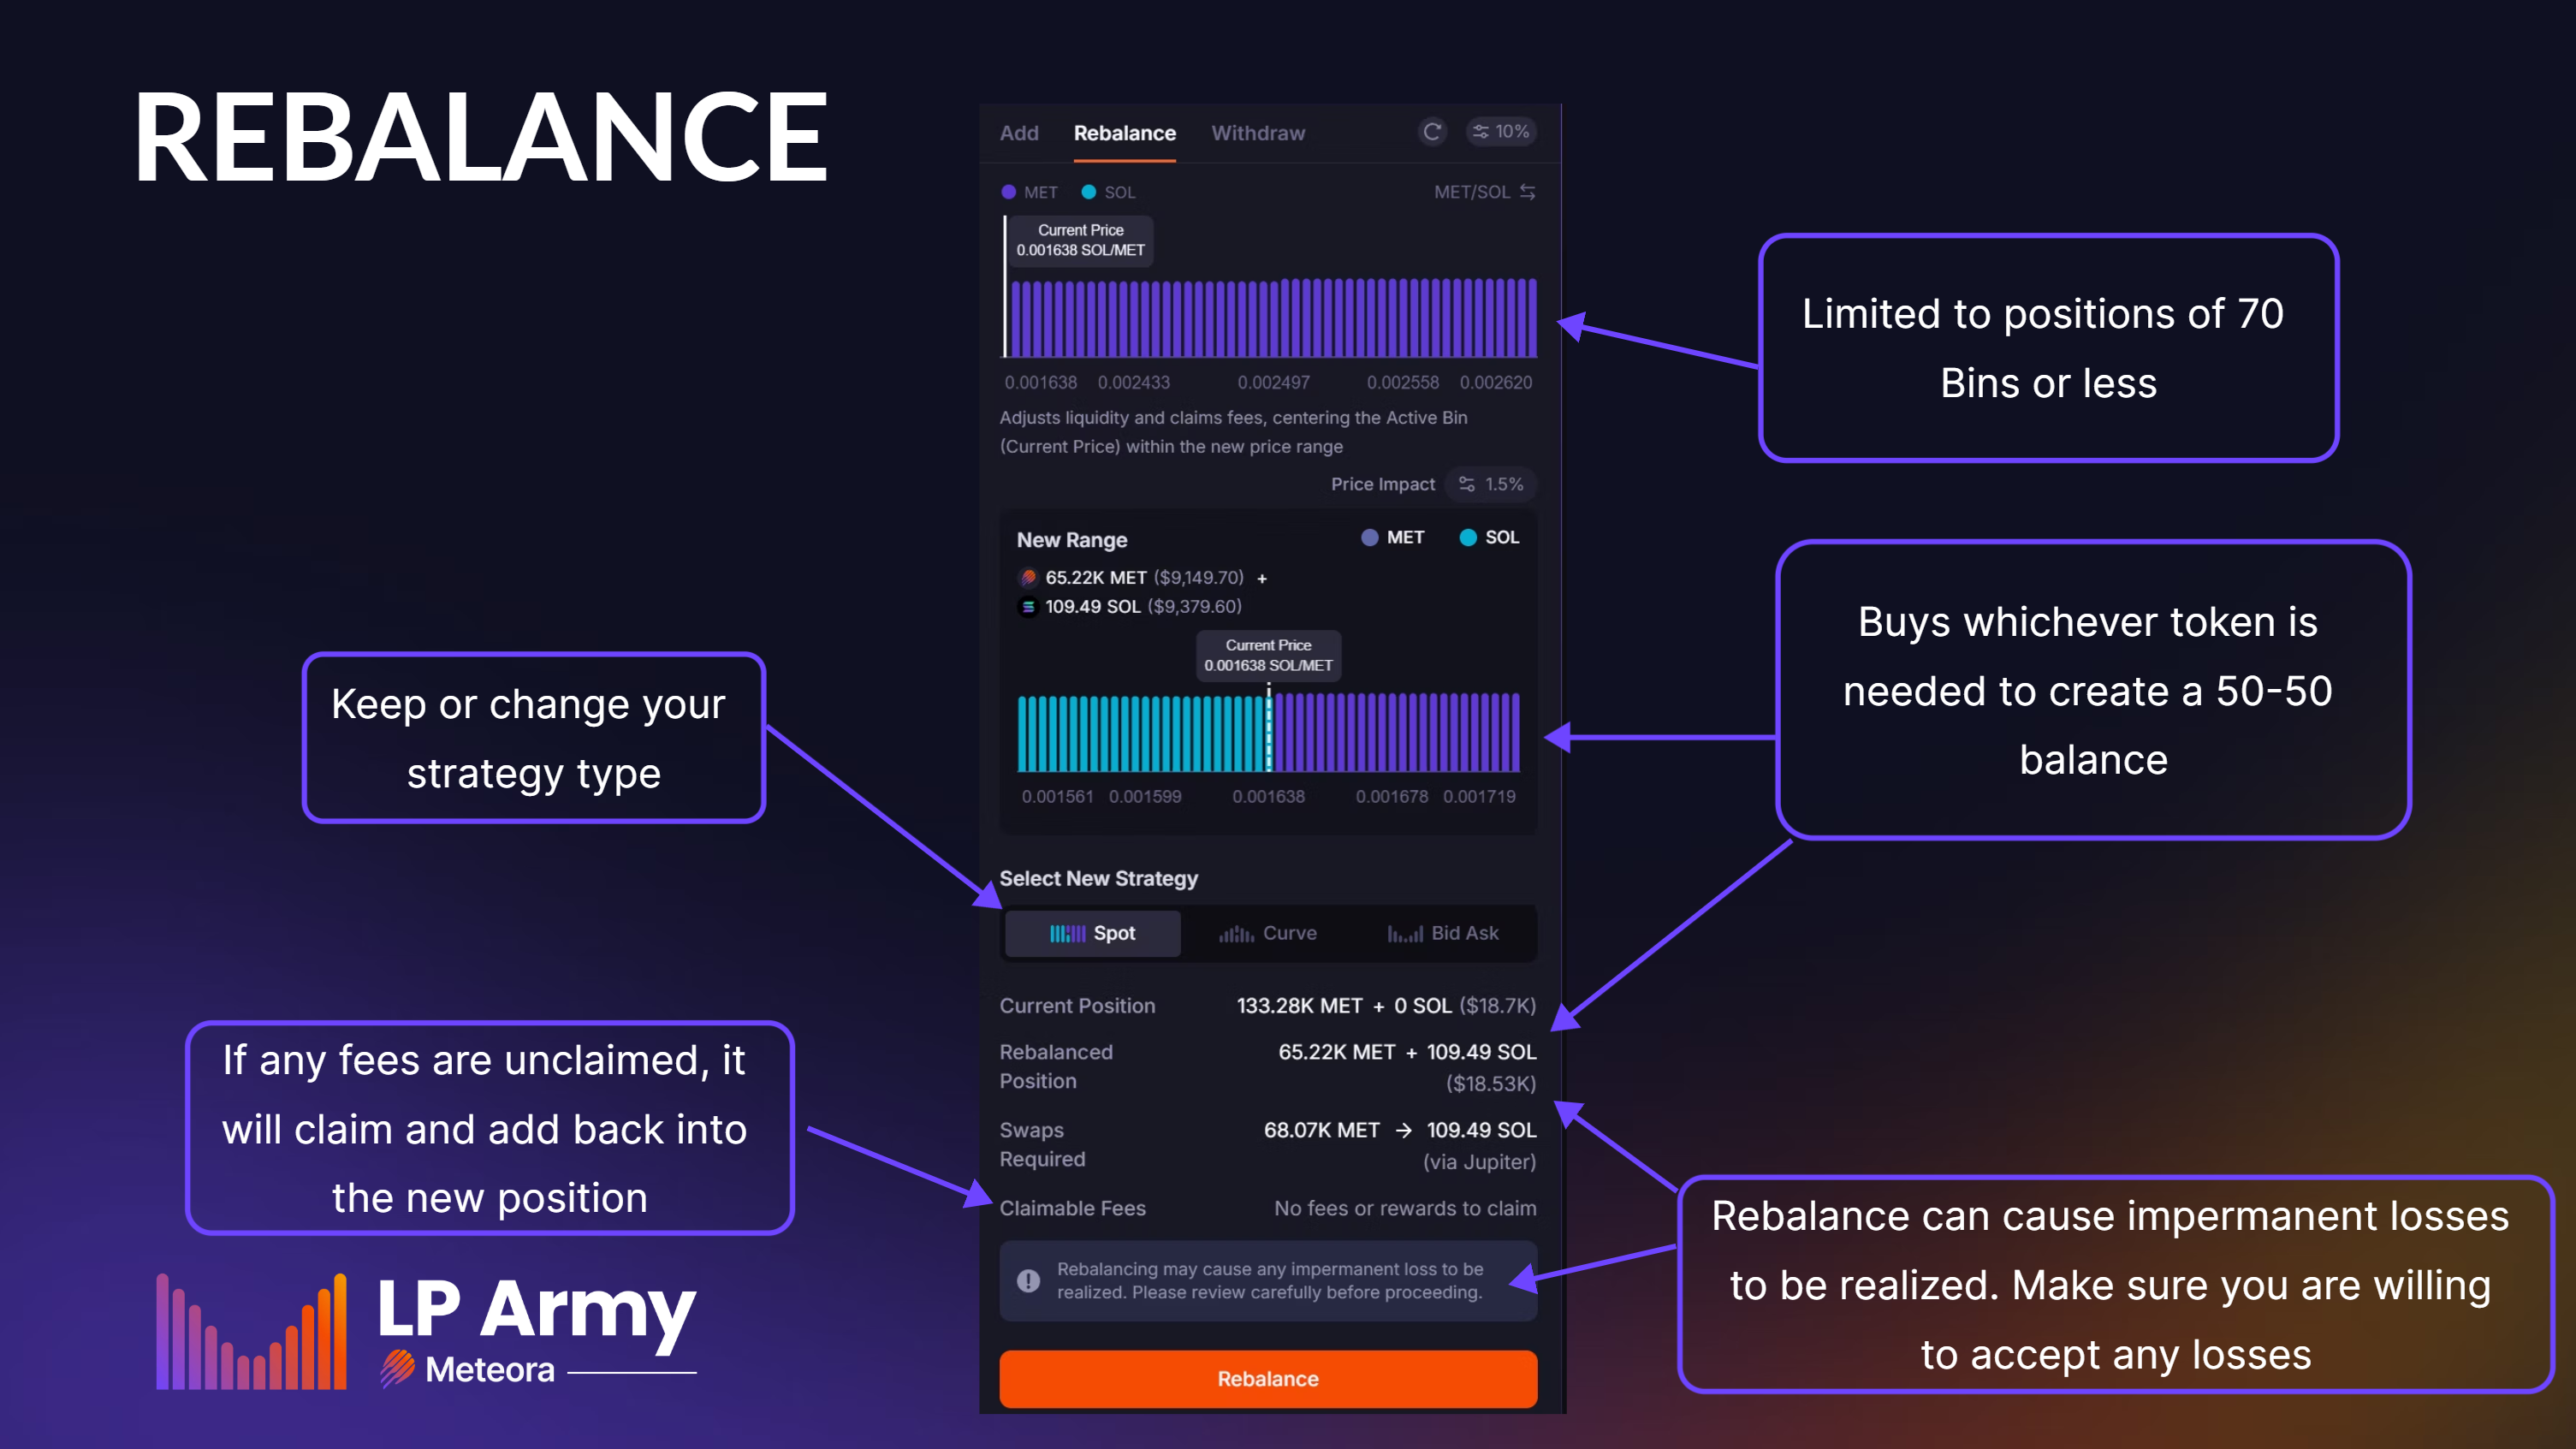
Learn how to create positions
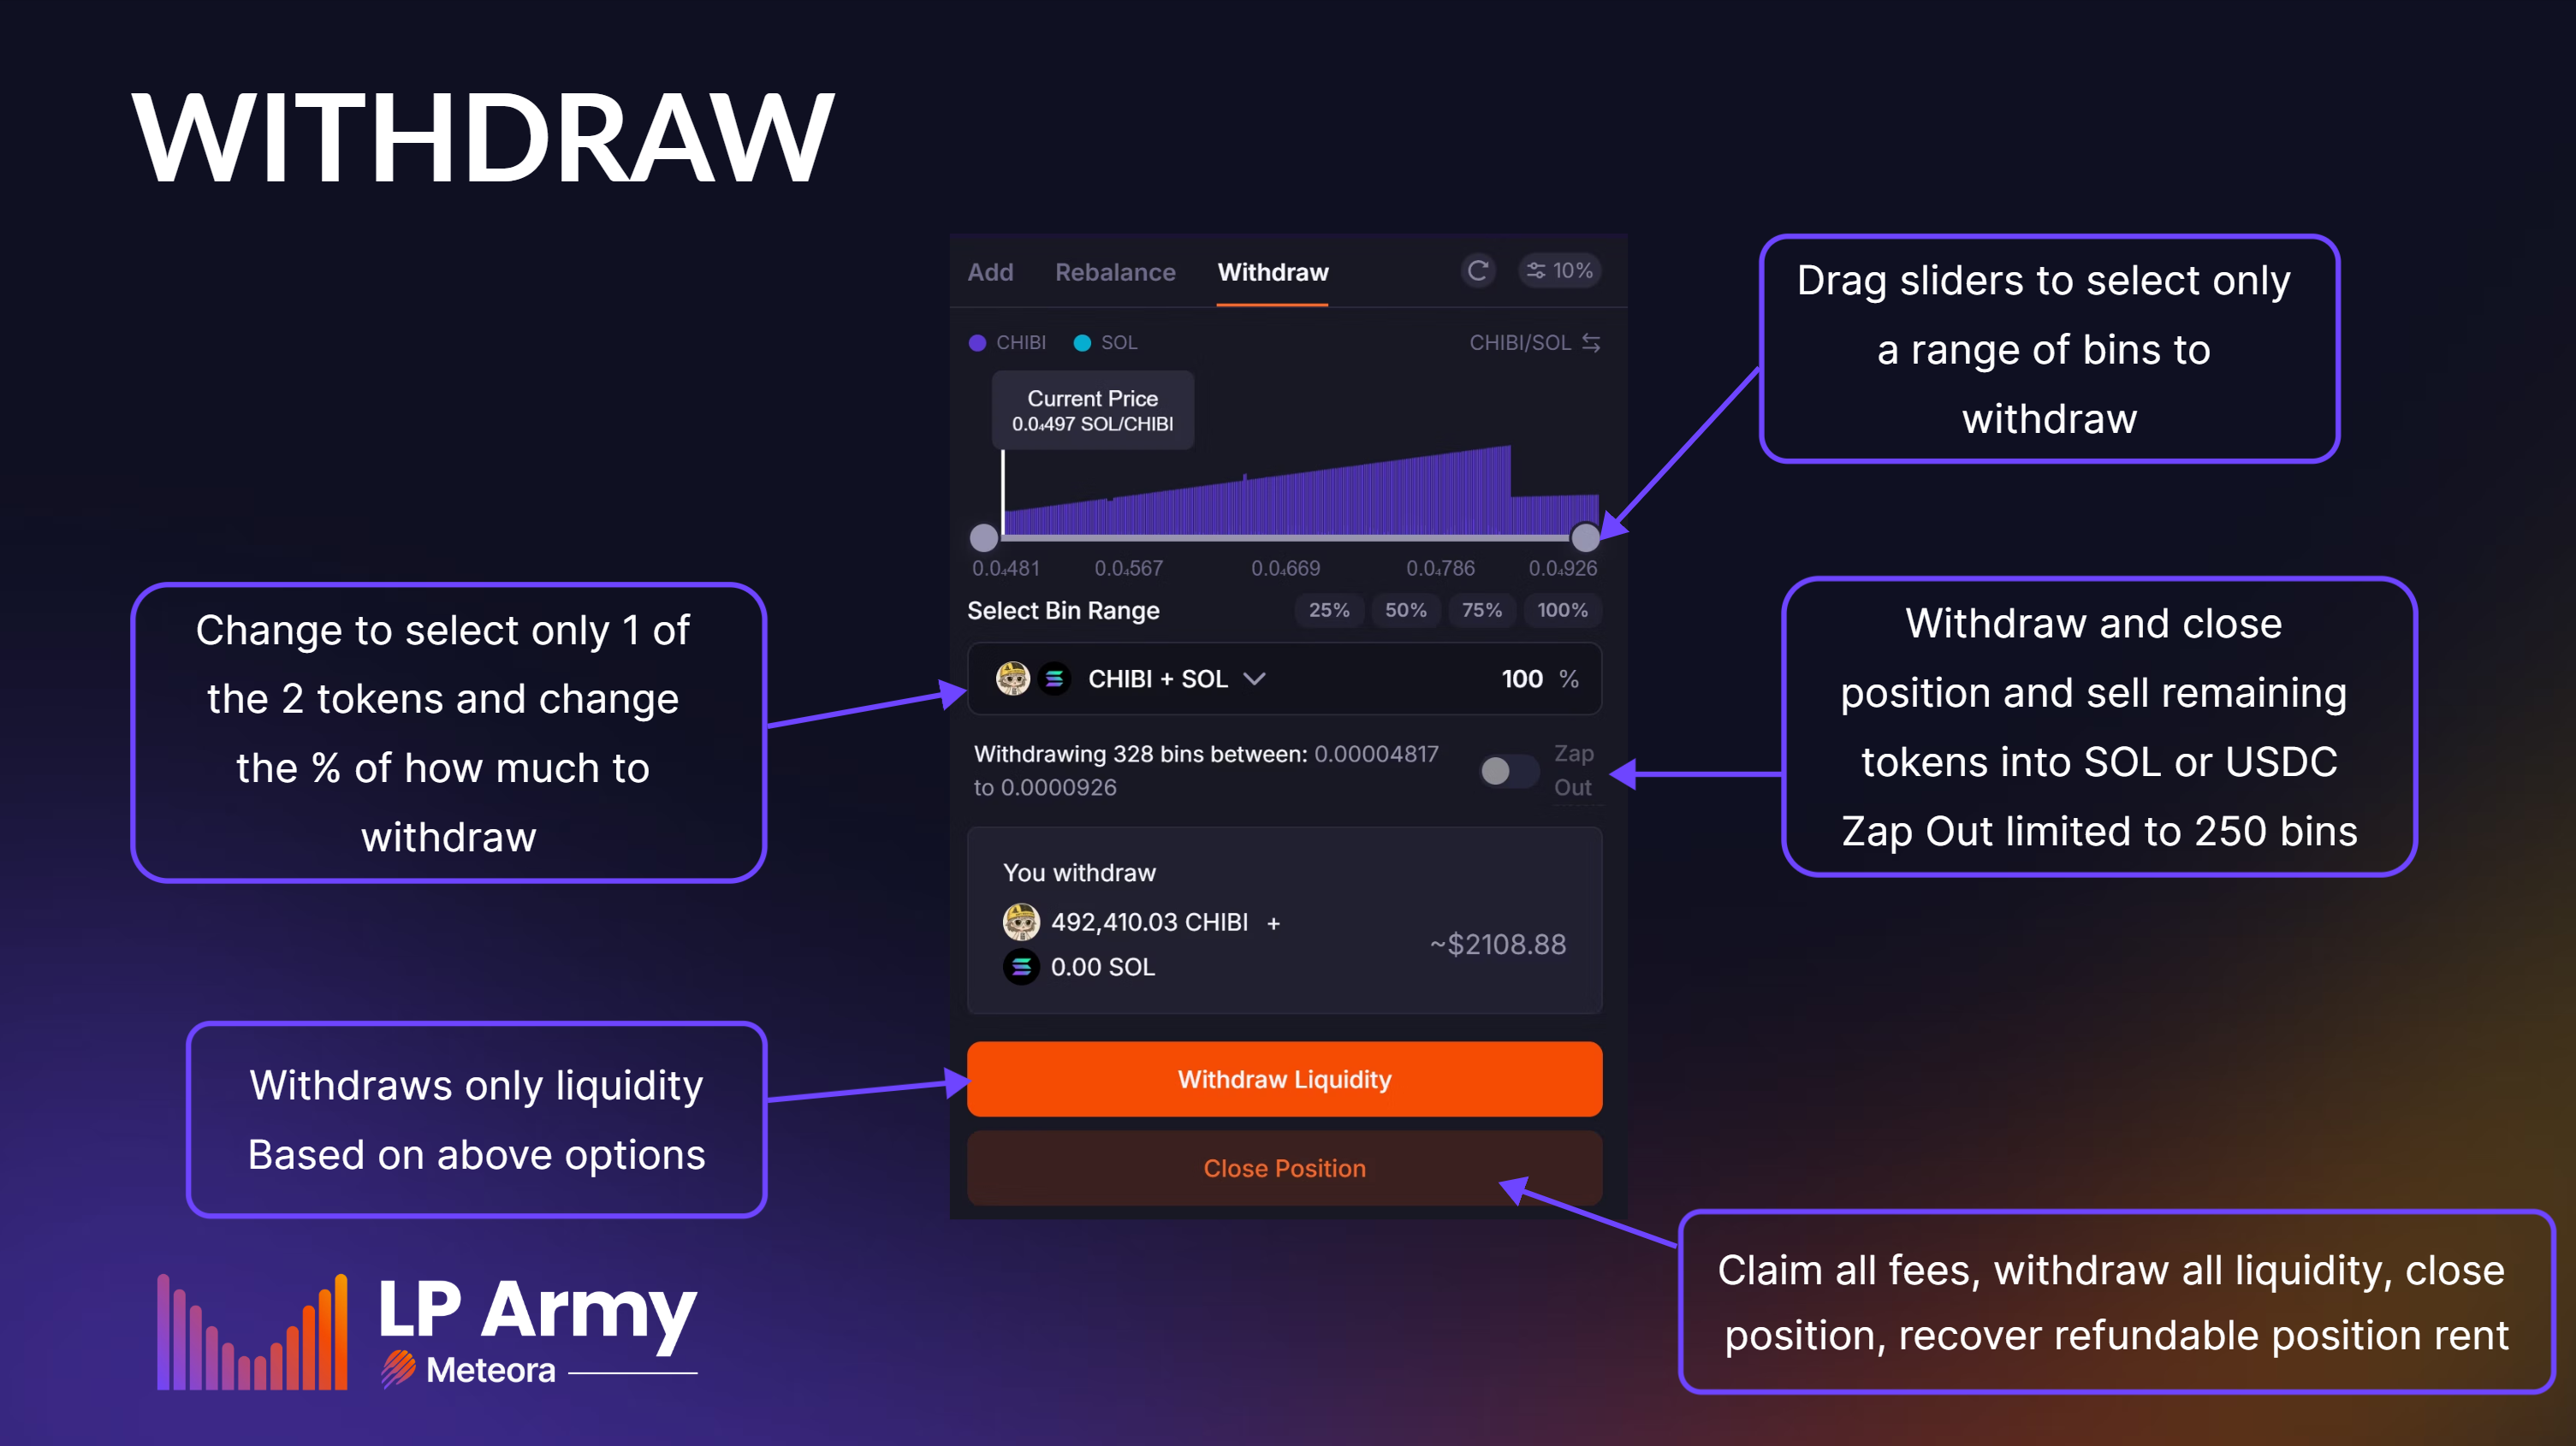
Understand withdrawal and the many options
Master the dashboard
Understand the key components and sections of the UI
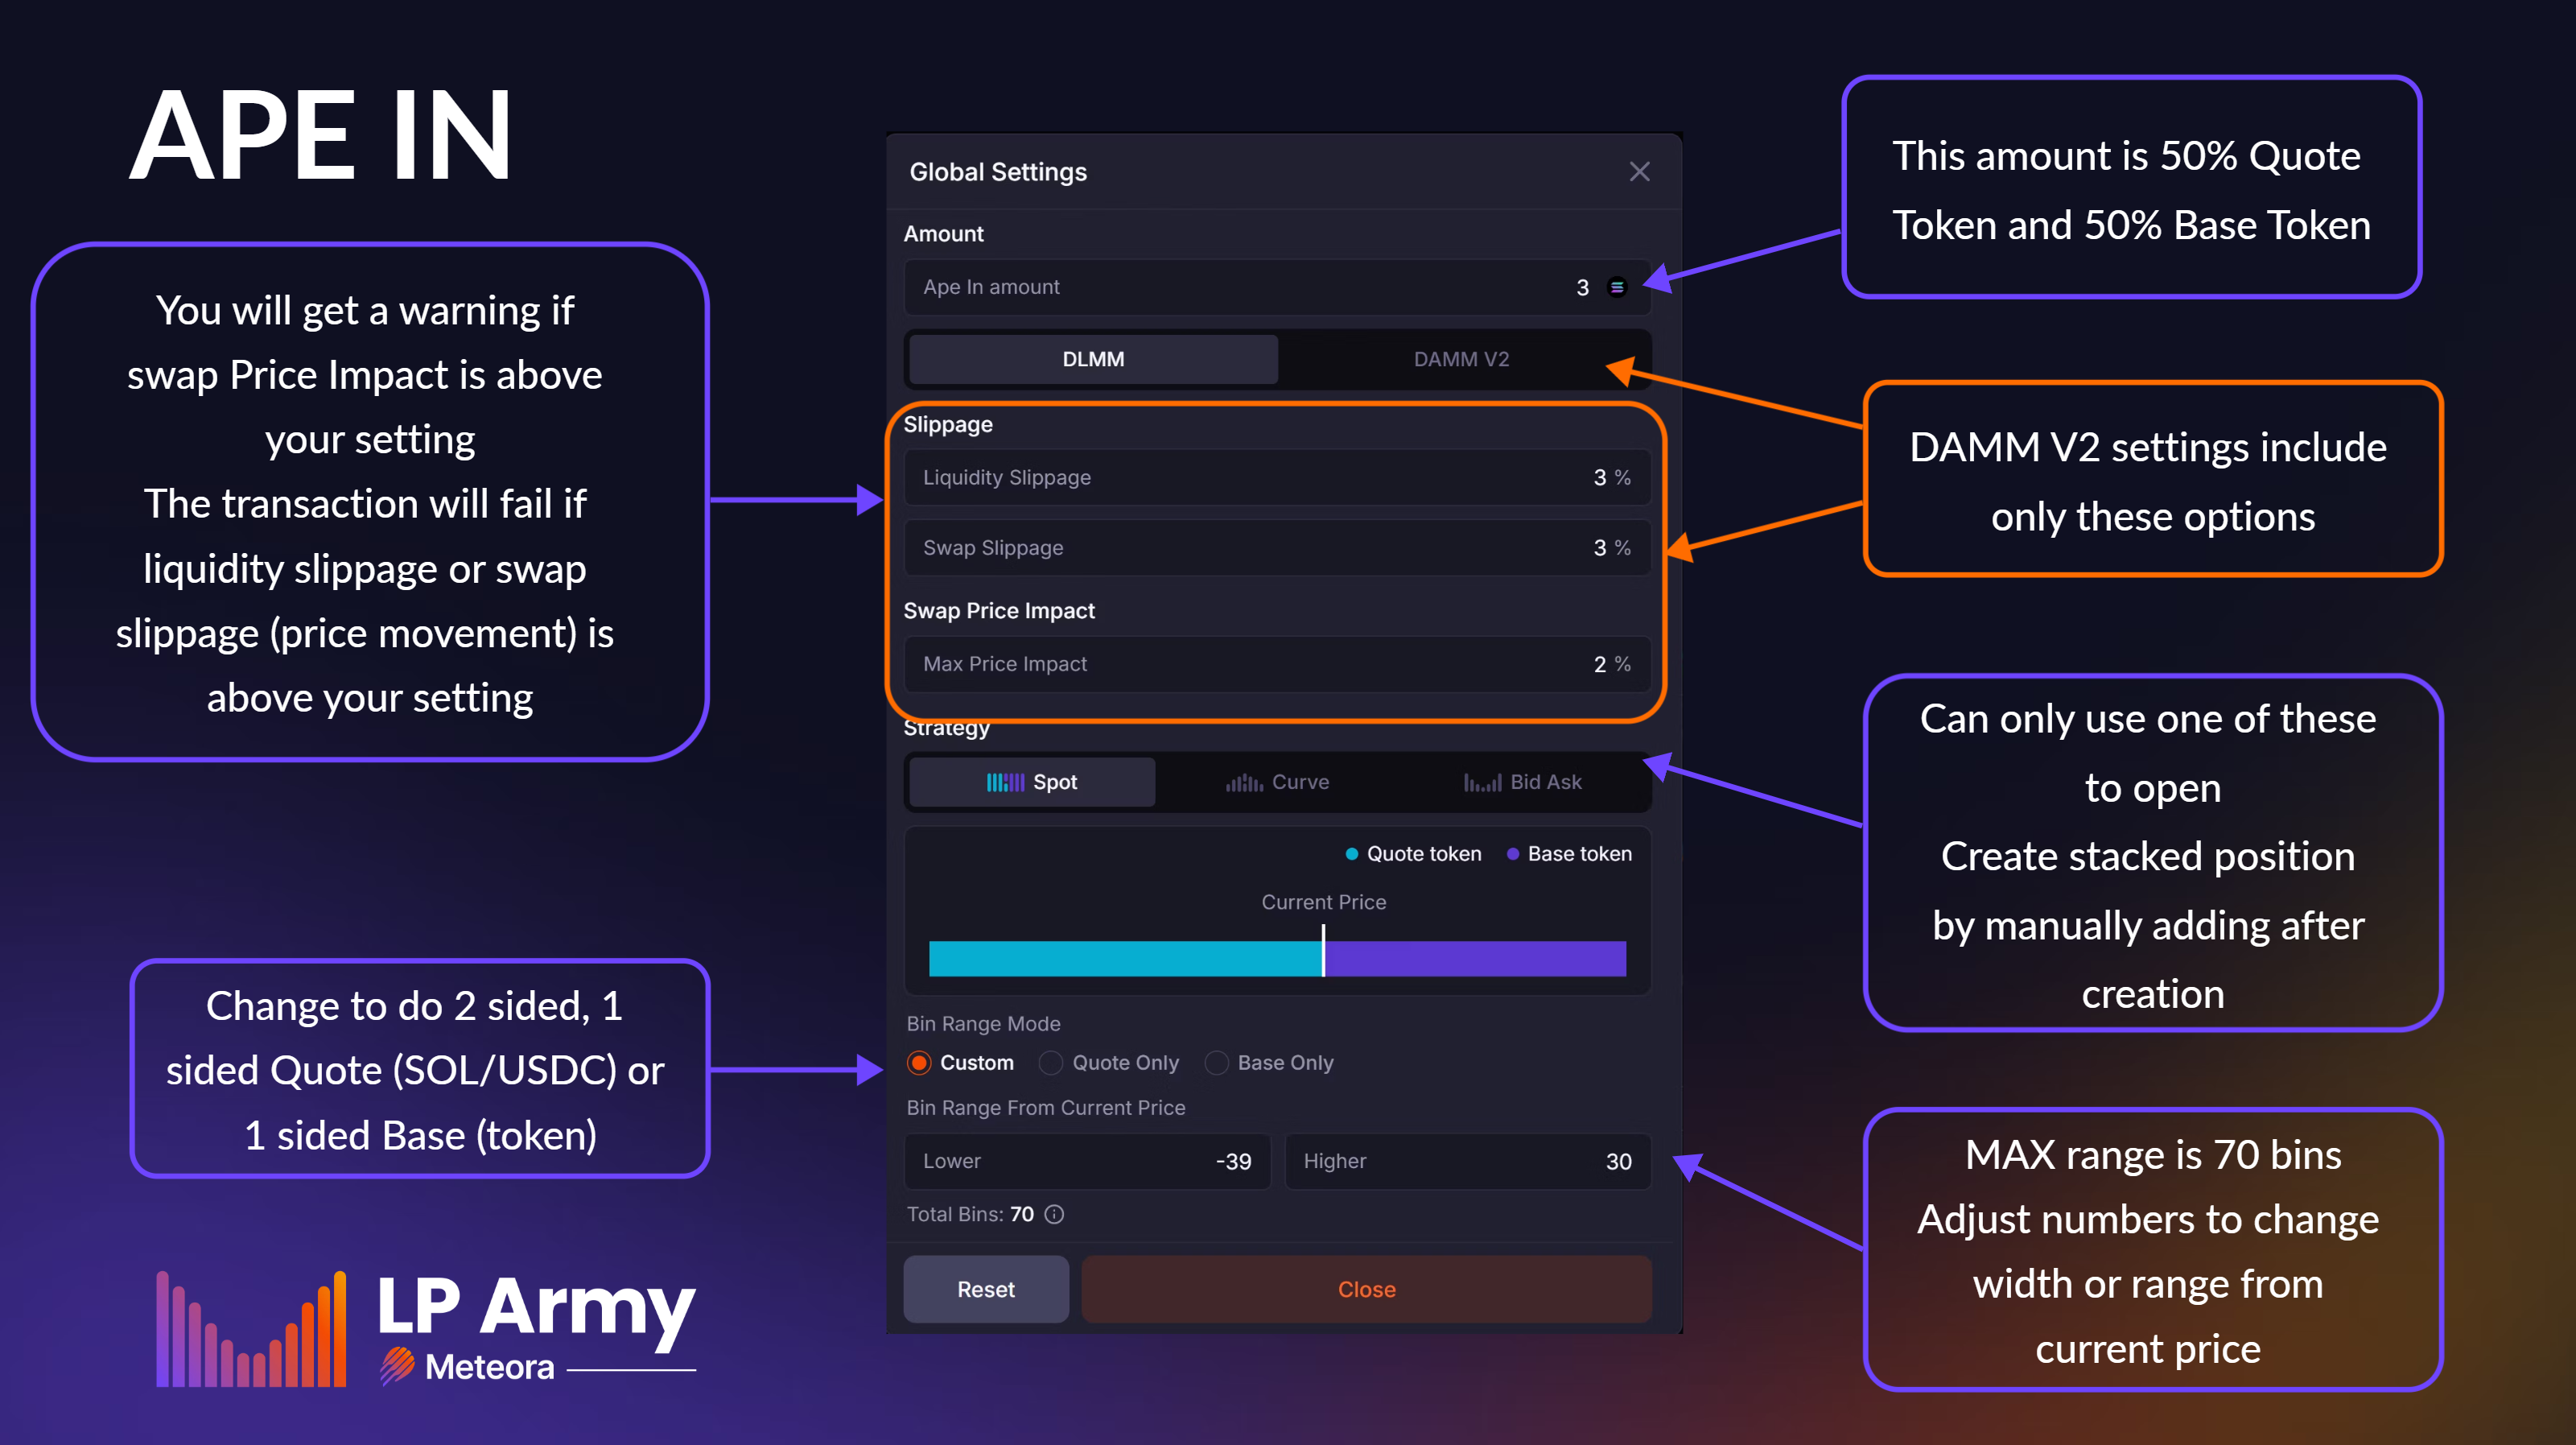
Ape In and Zap Out features
Technical Core
Key Insights
Change RPC and Global Priority Fees to ensure smooth transactions
Zap out allows you to automatically sell one token for another upon withdrawal
Many withdraw options, including partial amounts and specific bins
Ape In to quickly enter a position
How to deposit 1 sided and 2 sided liquidity
Key metrics are clearly displayed
Risk Management
Warnings
Zap out feature is limited to 250 Bins
Pay attention to all warnings or you may lose money
Creating pools and bin arrays cost money (rent) to create and cannot be refunded
Advanced Metrics
Pro Tips
Position rent is refunded upon closing of the position
Many settings available, including liquidity and swap slippage